This blog site focuses on cards and projects utilizing materials and tools from various scrapbooking and paper craft companies.
If you are interested in cards and projects made with rubber stamps from various companies, please check out my other blog site "Stampin' Inspirations".


Come and join the Christmas Group Site on Paper Craft Planet
Click on the banner below


Tuesday, December 12, 2006

New Website

I'm planning to create a Stampin' Up! website as well maintain the Stampin Up blog on this blog site. If it's too much work, I'll probably just add a link to this site and blog on the other website. I will continue to keep this blog for other rubber stamping information.

Anyway, I have fun posting these blogs. It keeps me entertained considering I have a tendency to get bored rather quickly.

The other website will be my own domain and right now it's under construction. Once I've created the template, I'll add the link to this blog.

I like this blog site because it's very EASY to maintain.

Until later. . .

Stampin Up Loads of Love stamp set

I really love this Stampin Up stamp set. I made several cards yesterday using this set. I distressed all of them because lately, I've been loving the distressed look. I made a few cards not posted on this site but decided not to post them all because it'll get too redundant.


The flap of the truck opens up to reveal a hidden message as shown in the picture. This was an easy way to create a hidden message.


Thursday, December 07, 2006

Christmas Decorations

Well, we finally got our Christmas tree up on the weekend and we even managed to decorate the house. When we moved to California from Hawaii, we sold half of all the Christmas decorations we had to reduce the weight of the shipment of our things. My daughter asked me yesterday why did I sell "our memories". I really didn't think of it at that time but she's right. I sort of regret it but that's okay, we managed to fill the house with decorations even with only half of our decorations. I think too many decorations begin to look a bit tacky anyway.


Here is a picture of our home this year.


Christmas 2006. Funny but our Christmas Tree looks a bit bare compared to previous years. It really looks different in picture. Actually, in real life, the tree looks really decorative. We decorated the house less than we had in previous years. It's just a lot of work and the kids are older and don't seem to appreciate the decorations as much as they used to.


Christmas 2005. The "blue" Christmas. No group picture for this year. This Christmas was our first year in California and I was a little depressed. All of our things were in boxes and I was not in the mood to unpack the Christmas decorations. My daughter's posing for the camera.


Christmas 2004. Our group picture turned out blurry. It was a little sad because we didn't have a clear group picture for this year.


Christmas 2003. Our tree seem to look the same every year. I like this group picture. We dressed up for dinner.


Christmas 2002. I love this Christmas. It was a really Happy Christmas. I love how we decorated the house. I miss the cathedral ceiling at our house in Hawaii.

Wednesday, December 06, 2006

Distressed Technique

Distressed designed cards are fast becoming popular. Its popularity stems from the shabby chic craze a few years ago and cards and scrapbook have now bought into the concept that aged, torn and otherwise "used" appearance of cards are now appealing. Vintage cards have always been popular but as a collectors focus but"faux" vintage cards can now be created without waiting for the cards to age on their own. Here are a few cards I made to appear slightly vintaged - a bit of a new and old appearance. The picture does not really show the torn appearance of the cards, it shows better in person. Anyway, I used the same Stampin Up set to create all these cards.


Monday, December 04, 2006

Stampin Up Demonstrator

Well, I did it. I'm officially a Stampin Up Demonstrator as of today. I received my ID today. I think I'll be set up a seperate Stampin Up blog just for Stampin Up stuff.

I'll continue this blog site for other stamping stuff.

Until later. . .

Sunday, December 03, 2006

New Template

I needed a change. I changed the template to my blog site. I'm liking this one right now. The layout of my blog is still the same but just a few changes such as color and borders. Hope you like it. I'll probably change it again in a week or so.

Got to get back to card-making for a craft fair tomorrow.

Until later. . .

Friday, December 01, 2006

One of the many uses of Pearl EX

For those of you who are unfamiliar with Pearl Ex. Pearl ex is a shimmery mica powder that is added to various mediums or by itself using a sticky medium to "hold" the powder. Click on my post title for a list of Pearl Ex tips and techniques.


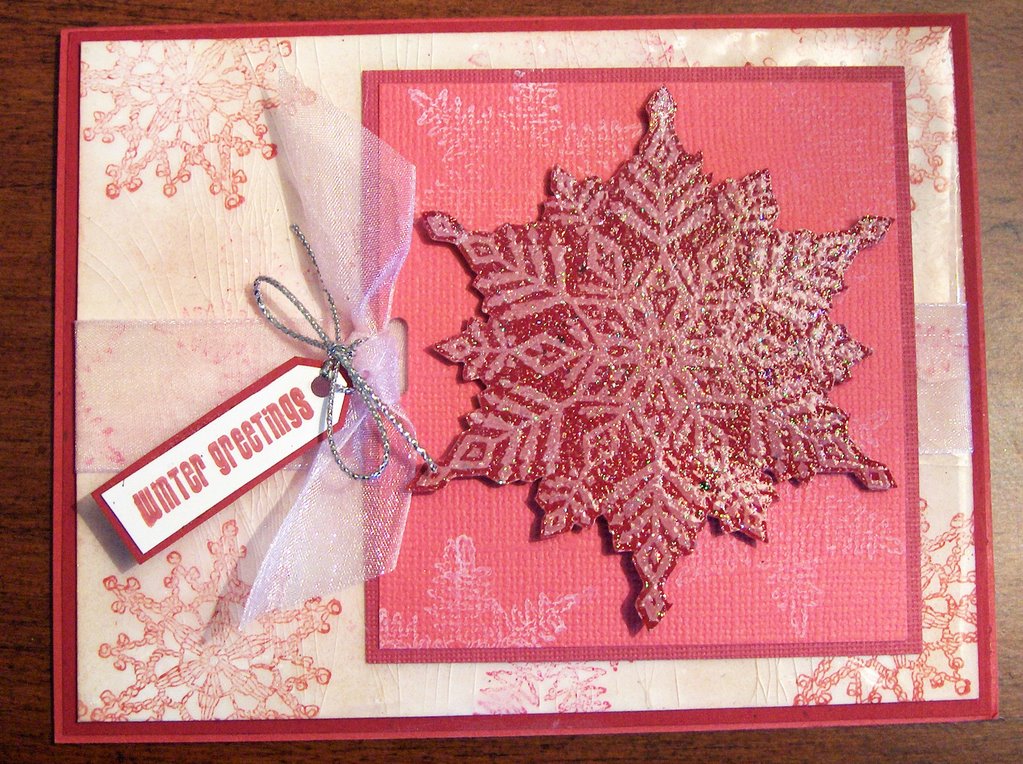
For those familiar with Pearl Ex, have you ever tried to apply Pearl Ex to dark cardstock but find that the color don't seem to stand out as much as you'd like? To solve this problem, rubber stamp your image using white pigment ink as opposed to Versamark or embossing ink, apply the Pearl Ex color preference as you normally would and brush off the extra powder. Whala! You end up with a very vibrant shimmery color that clearly stands out.


The card below was created using this technique.


.

Cracked Glass Technique

I tested out this technique. A fellow stamper told me that when she did it, the embossing powder flew all over the place and she was right. Luckily I had an tray to help prevent the embossing powder from flying out too badly. I found that if holding a paper at the opposite side of the embossing tool using a tray, when heating up the image, the stray embossing powder bounced on to the paper and fell back on the tray.


The picture cannot capture the shiny cracked glass appearance of the background. That's too bad. . .take my word for it, it's really cool.


Click on the post title for the instructions for this particular technique. The difficulty level for this technique from 1 to 5, I would say a 2. It's actually not difficult. . .it's similar to regular embossing but UTEE thick embossing powder is used rather than regular embossing powder.

I'll write an instruction for the snowflake later when I have the time. If you don't have a particular color of embossing powder or pigment ink and would like to recreate a particular color, there's a way to do it without having to buy additional embossing powder. I'll explain later.