This blog site focuses on cards and projects utilizing materials and tools from various scrapbooking and paper craft companies.
If you are interested in cards and projects made with rubber stamps from various companies, please check out my other blog site "Stampin' Inspirations".


Come and join the Christmas Group Site on Paper Craft Planet
Click on the banner below


Saturday, December 30, 2006

Happy New Year from Disneyland

Here I am at Disneyland! Just taking a break from all the fun rides. We'll be heading out to dinner in 15 minutes but I just had to blog before we leave.

We rode the California Scream, the Twilight Zone Tower of Terror, and Maliboomer! It was fun! It's great because the lines were really short. The longest wait was only 20 minutes. The last time we were here during the summer, the wait for each ride was 1 to 2 hours.

Before dinner, we're heading down to watch the "Christmas Fantasy" Parade. I'll take a few pictures tonight and post them before I go to bed.
Here is a picture of my daughter at "Small World"

As an update. . .we didn't have a chance to see the Christmas Fantasy Parade. . .it was sooooooo CROWDED. I kid you not. We'll try again tomorrow night. . .we'll head down to Disneyland earlier this time and save ourselves a spot.

Until later. ..

Friday, December 29, 2006

Pearl Ex

This stamp is a sunflower stamp by Magenta.


I know this card is a bit busy. Anyhow, I wanted to create a colorful distressed card.

Instructions on the flower only

Materials

White craft ink
White embossing Powder
Heating Tool
Pear Ex
Gum Arabic
Watercolor brush
Instructions
  • Rubber stamp the image with Stampin Up white craft ink

  • Apply white embossing powder

  • Heat with heating tool

  • Dip watercolor brush with gum arabic

  • Dip into Pearl Ex

  • Color in the image

  • Continue to dip the watercolor brush into gum arabic and pearl ex and color the image until all of the image is colored in

Gum arabic works well with Pearl ex to "hold" the Pearl Ex. Once dry, the Pearl Ex stays adhered and will not rub off.

There's other mediums that can be used to help the Pearl Ex stick when coloring images. Future floor wax (yes, a floor wax) can be used like the gum arabic and is a lot cheaper. I didn't have any on hand so I used the gum arabic.

I did the same thing with this card but using a darker red Pearl Ex.


Rasberry Delight

This card was created using a stamp by Magenta. I colored in the image using markers and stamped on to glossy cardstock.

I blended the colors using a blender pen and filled in the background by pulling colors from the stamped image and coloring in the white areas with a blender pen.

I applied Versamark all over the image then heat embossed it with clear embossing powder. The image was then matted on to a Stampin Up Old Olive cardstock.

The background leaves were done in two colors, Stampin' Up Old Olive and Garden Green dye inks on to glossy cards. The stamps used was Stampin' Up Bold Blossoms.

I attached the the rasberry image on to the leafy background using foam tape then glued the background on to the larger background.

The sentiment was stamped with Stampin up Small Script and attached with foam tape to give it a 3D appearance.

I used olive organdy ribbon as embellishment.

This card took about 30 minutes to make.

Primavera

Hero Arts carry a great line of rubber stamps. The image of this card is called Primavera by Hero Arts. All the images are on one stamp sort of like a collage.

I sponged various colors using Pastel Kaleidacolor to white glossy cardstock. Using the same ink pad, I inked the rubber stamp and stamped over the inked background.

I enhanced the flower and the swirl images by adding glitter.

I used Stampin Up Ticket Corner punch to punch the corners on two different colored mats (pink and blue) and layered the image.

The sentiment was created using Stampin Up Small Script and punched with an oval punch. I then matted it on to pink cardstock. I cut around the oval shaped sentiment using scalloped scissors.

The background. . .although not the greatest. . .is scrapbook paper by DCWV. I used 5/8" ornandy ribbon to embellish the card.

This was a quick and simple card that can be done in 15 minutes.

Until later. . .

Grateful

This card was created using Hampton Art Stamps "Watercolor Daisy". I really love this stamp because you can't go wrong with it's design.

You can't really tell by the picture but the background of the flower is multi-colored.

Instructions

Using a sponge I colored the background with Stampin Up Baroque Burgundy and Old Olive dye ink. When it dried, I rubber stamped the flower.

I colored in the image with regal rose and I believe the leaf was colored with old olive or some other Stampin up ink using a blender pen. It really doesn't matter I suppose.

I mixed in a little bit of Stampin Up Only Orange and shadowed the flower petals with Baroque Burgundy.

The copper brads were added to enhance the orange highlights of the flower.


The sentiment is a stamp from Stampin' Up Small Script.
To add color and contrast, I used scrapbook paper for the background and organdy ribbon to finish up card.

That's it. . .very simple
This is another card I made using the same stamp but a little different layout. The corners of the image was punched using Stampin Up Ticket corner punch.

Until later. . .

Subscription works

Fabulous! My subscription feature I added to this blog site actually works. I received an email today with my post updates. The only thing I don't like about it is that it sends the heading of my blog along with the updates so I receive the big banner at the top of my blog. I'm not sure how to correct it without removing my heading which I really like.

I guess it's okay. I don't think I'll have a lot of subscribers anyway.

Until later. . .

Thursday, December 28, 2006

Blog Subscription

I added a feature on my blog site so that my readers can receive post updates via email. This post is to see if it actually works. I added myself as a subscriber and I'm testing it out to see if I'll receive an update.

DCWV Scrapbook Paper

Aside from Stampin' Up, I love DCWV (Die-Cut With a View) cardstock and scrapbook paper. This card was created using DCWV scrapbook paper. I just love the dot design. It went so well with the ribbons.

The stamp image is a sunflower by Magenta. I rubberstamped the image with Versamark, then heat embossed it with gold embossing powder.

Using my fingers I smudged Stampin' Up eggplant envy in between the embossed image to color in the flower.

The rest is self explanatory.

Until later. . .

Photo On My Heading

As you can see, I have a new heading. Whoohoo. It took a while for me to figure out how to insert a photo as opposed to the default heading provided. It drove me mad trying to add a photo. Luckily, I know a little bit of html to finally figure out where I can insert the html code.

I, initially, tried to do it on the template html code area. . .BUT, could not figure out which of the hundreds of html code applied to the heading. I'm sure a computer geek could have figured it out quickly. . .but I'm barely computer literate so this was a major challenge.

For anyone interested how I did it. . .it's a bit of task but it's easy if you don't have to go through what I went through. As a matter of fact it was so simple, I can't believe that I went through the trial and error of changing the template's html codes.

Here is how it's done. . .the easy way.

Load your photo or image on to a host site. I use a host site called "image shack". . .there's tons of them out there so which ever one you choose to use don't matter. The photo of my heading is a picture I took of a Basic Grey scrapbook paper. I used a photo editor to add my title. I uploaded the photo on to Image Shack.

Copy the photo url provided by your host site.

Click on the setting and on the section that ask for your Blog Title - insert this code (img src="paste the url between these two quotes"). When adding the actual code. . .don't use parenthesis as shown on the code provided. . .replace the ( ) with < >. I can't type it with the <> signs because this blogger thinks I'm trying to add a photo when I type the actual code.

If you prefer. . .leave the section that ask for your "blog description" blank, otherwise it'll add your description at the bottom of your header's image. I decided to remove it but I'm considering adding it back on.

That's it! SIMPLE.

If you have any questions on how to add your photo to your title, feel free to email me or add a comment!

Until later...

Tuesday, December 26, 2006

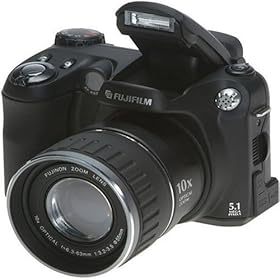
New Camera

Whoohoo! I received a new digital camera. I believe this is my 4th digital camera in the last 7 years. I already had a good HP camera with 5.1 mp but I could never get a clear picture without sufficient light or using the flash which was very annoying especially when taking pictures of my cards. I don't like to use flash when taking pictures of my cards because it distorts the color so I always needed to wait when sufficient light is shining into the house.

Well. . .I took pictures of my cards in low light but with a high ISO and the picture came out clear and beautiful. My husband bought one for my daughter for Christmas because she mentioned she wanted to take a photography class during the summer. Because she's only 15, I decided that it was best that we attend the class together at the community college near our home. She'll receive college credit while learning something new, perhaps one day may become a hobby for her. Anyway, I told my husband that I could share the camera with my daughter or just use my old camera. I really didn't want a new camera because my old camera did what I needed it to do. To make a long story short, my husband bought the camera for me for Christmas also. I was surprised and a bit hesitant about keeping it because I already had a camera.

Anyhow, after taking several pictures - our Christmas tree in the dark, my cards in low light, my daughter, zoom shots, etc. It was a keeper. My other camera could not take a picture of our Christmas tree in the dark with the Christmas lights on. It would always be blurry or unable to focus on the lights and refuses to take the picture. My old camera was more expensive because I bought it when it first came out but my new camera beats it hands down. I can't wait to take pictures with it.

Until later. . .

Monday, December 25, 2006

Merry Christmas

Merry Christmas to my readers. Wow, in 20 minutes Christmas will be over. What am I doing blogging? Well, we had a busy day with Christmas stuff and this is my way of relaxing. I make cards to wind down and blogging also sometimes help me to relax and reflect on my day.

I'm now looking ahead to New Years! We're heading to Disneyland for New Years! I can't wait. . .it'll be fun.

As a closing. . .I would like to thank God for the wonderful life I have. I believe that someone is watching over me and feel very fortunate. Sometimes I may not be grateful and feel that I want more or need more out of life but at the end of the day, I have to admit I am extremely blessed.

I hope everyone had a wonderful Christmas and I hope your New Year will be filled with many blessings, prosperity, and most of all . . .peace and happiness.

Merry Christmas!

Goodnight. . .until later.

Thursday, December 21, 2006

House Birthday

Here are two cards made with one stamp. One for a girl and one for a boy. I really don't like the purple one because the saying covers a chunk of the main image. Although House Mouse is one of my favorite rubber stamp design, many of their images are two large for a standard handmade card. Unless you increase the size of the card to a 5 x 7 inch card, it's difficult to be creative with the design. On the up side, because House Mouse images are so well down, you really don't need to add a lot of embellishment or extras to make a really nice card.


Friday, December 15, 2006

Just a few cards I made


This card is actually a pocket card. The flowers were stamped with Stampin' Up vanilla craft ink then heat embossed with white embossing powder. I then cut the images out and layered them using foam tape.


I just love this cat image. She's a grumpy cat and I like the saying. . .hmmm very convincing. The background was stamped with Stampin' Up "Island Blossoms" using the "resist stamping" technique.

Quick instructions for the "resist stamping" technique:

On glossy card stock stamp image using Versamark.

  • Heat emboss the image with clear embossing powder.
  • With a brayer, ink over the image using dye ink.
The image stamped with versamark ink will resist the ink thereby, the image will appear white and the rest of the card will be colored with the ink that you used.


I absolutely love these cat stamps by Penny Black. They are so detailed and so cute. It doesn't take a lot of work to create a nice card using these stamps.


House Mouse are one of my favorite stamps. They are so detailed and easy to work with. House Mouse are sold by Stampabilities. There are other brands that carry this line. . .I believe the other one is Stampa Rosa.


This card was created using 3 different Stampin' Up set. The flower and background images were stamped with "Looks like Spring", the verse "happy" was stamped with "Polka dots and paisley" and the "birthday" verse was stamped with the "Sincere Salutations" set.
The flower background was stamped using white pigment ink on a dark red cardstock. It's the only way the images will show up using ink alone. . .

I made a bunch more but I'll post only these cards for now.

Unitl later. . .

Tuesday, December 12, 2006

New Website

I'm planning to create a Stampin' Up! website as well maintain the Stampin Up blog on this blog site. If it's too much work, I'll probably just add a link to this site and blog on the other website. I will continue to keep this blog for other rubber stamping information.

Anyway, I have fun posting these blogs. It keeps me entertained considering I have a tendency to get bored rather quickly.

The other website will be my own domain and right now it's under construction. Once I've created the template, I'll add the link to this blog.

I like this blog site because it's very EASY to maintain.

Until later. . .

Stampin Up Loads of Love stamp set

I really love this Stampin Up stamp set. I made several cards yesterday using this set. I distressed all of them because lately, I've been loving the distressed look. I made a few cards not posted on this site but decided not to post them all because it'll get too redundant.


The flap of the truck opens up to reveal a hidden message as shown in the picture. This was an easy way to create a hidden message.


Thursday, December 07, 2006

Christmas Decorations

Well, we finally got our Christmas tree up on the weekend and we even managed to decorate the house. When we moved to California from Hawaii, we sold half of all the Christmas decorations we had to reduce the weight of the shipment of our things. My daughter asked me yesterday why did I sell "our memories". I really didn't think of it at that time but she's right. I sort of regret it but that's okay, we managed to fill the house with decorations even with only half of our decorations. I think too many decorations begin to look a bit tacky anyway.


Here is a picture of our home this year.


Christmas 2006. Funny but our Christmas Tree looks a bit bare compared to previous years. It really looks different in picture. Actually, in real life, the tree looks really decorative. We decorated the house less than we had in previous years. It's just a lot of work and the kids are older and don't seem to appreciate the decorations as much as they used to.


Christmas 2005. The "blue" Christmas. No group picture for this year. This Christmas was our first year in California and I was a little depressed. All of our things were in boxes and I was not in the mood to unpack the Christmas decorations. My daughter's posing for the camera.


Christmas 2004. Our group picture turned out blurry. It was a little sad because we didn't have a clear group picture for this year.


Christmas 2003. Our tree seem to look the same every year. I like this group picture. We dressed up for dinner.


Christmas 2002. I love this Christmas. It was a really Happy Christmas. I love how we decorated the house. I miss the cathedral ceiling at our house in Hawaii.

Wednesday, December 06, 2006

Distressed Technique

Distressed designed cards are fast becoming popular. Its popularity stems from the shabby chic craze a few years ago and cards and scrapbook have now bought into the concept that aged, torn and otherwise "used" appearance of cards are now appealing. Vintage cards have always been popular but as a collectors focus but"faux" vintage cards can now be created without waiting for the cards to age on their own. Here are a few cards I made to appear slightly vintaged - a bit of a new and old appearance. The picture does not really show the torn appearance of the cards, it shows better in person. Anyway, I used the same Stampin Up set to create all these cards.


Monday, December 04, 2006

Stampin Up Demonstrator

Well, I did it. I'm officially a Stampin Up Demonstrator as of today. I received my ID today. I think I'll be set up a seperate Stampin Up blog just for Stampin Up stuff.

I'll continue this blog site for other stamping stuff.

Until later. . .

Sunday, December 03, 2006

New Template

I needed a change. I changed the template to my blog site. I'm liking this one right now. The layout of my blog is still the same but just a few changes such as color and borders. Hope you like it. I'll probably change it again in a week or so.

Got to get back to card-making for a craft fair tomorrow.

Until later. . .

Friday, December 01, 2006

One of the many uses of Pearl EX

For those of you who are unfamiliar with Pearl Ex. Pearl ex is a shimmery mica powder that is added to various mediums or by itself using a sticky medium to "hold" the powder. Click on my post title for a list of Pearl Ex tips and techniques.


For those familiar with Pearl Ex, have you ever tried to apply Pearl Ex to dark cardstock but find that the color don't seem to stand out as much as you'd like? To solve this problem, rubber stamp your image using white pigment ink as opposed to Versamark or embossing ink, apply the Pearl Ex color preference as you normally would and brush off the extra powder. Whala! You end up with a very vibrant shimmery color that clearly stands out.


The card below was created using this technique.


.

Cracked Glass Technique

I tested out this technique. A fellow stamper told me that when she did it, the embossing powder flew all over the place and she was right. Luckily I had an tray to help prevent the embossing powder from flying out too badly. I found that if holding a paper at the opposite side of the embossing tool using a tray, when heating up the image, the stray embossing powder bounced on to the paper and fell back on the tray.


The picture cannot capture the shiny cracked glass appearance of the background. That's too bad. . .take my word for it, it's really cool.


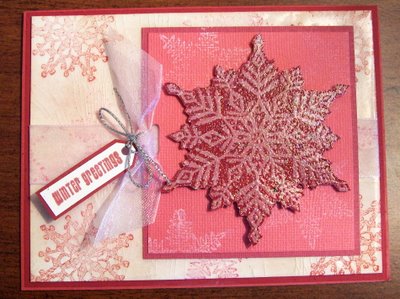
Click on the post title for the instructions for this particular technique. The difficulty level for this technique from 1 to 5, I would say a 2. It's actually not difficult. . .it's similar to regular embossing but UTEE thick embossing powder is used rather than regular embossing powder.

I'll write an instruction for the snowflake later when I have the time. If you don't have a particular color of embossing powder or pigment ink and would like to recreate a particular color, there's a way to do it without having to buy additional embossing powder. I'll explain later.

Thursday, November 30, 2006

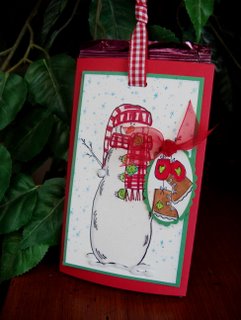
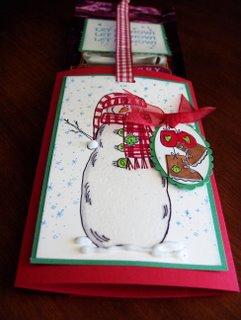
Cocoa Packet Pocket

I'm not sure what the name of this technique. . .I'll just call it "Cocoa Packet Pocket". Oh this is so fun. I learned to make it a the Stampin Up workshop. Oh, so cool. I have another sample on a previous post.


I made this one last night. I think I'm going to make a bunch of them. I heard you can do one for popcorn packets. Great idea!!


I'll post the card instructions later. Check back. I made a few other cards last night using a different technique. I'll post them on a new posting.
Until later. . .

Wednesday, November 29, 2006

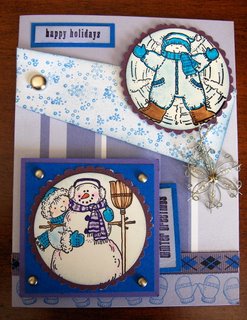
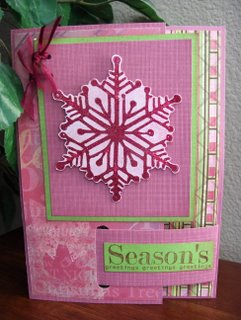
2 Christmas cards I made last night

I actually have other Christmas cards that I made from the previous week but I don't want to post them all. I'll just add those to my slide show but these are the two I made last night as well as the cards from the last 3 previous post.

The first card was created using a sketch and the other one was just a random card I made.


Big Buckle Technique

Click on the post title and it will link you to the tutorial for the "Big Buckle" technique. Again, like my previous post the Word Window punch was used. I like this punch. Cursor to the right side of my blog and look for the heading "labels". . .click on "Word Window Punch". This will show the different post using this punch.


Waterfall Technique

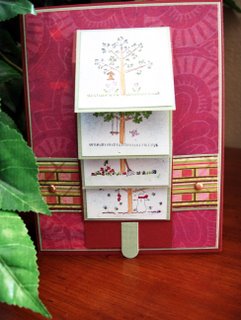
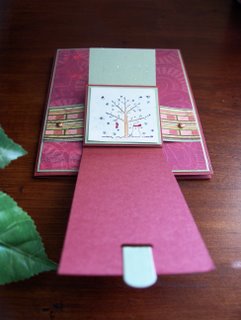
I made another card using the "waterfall technique". After making it the first time, I realized how easy it is to make. I plan to make a bunch more of these using different stamps and different size waterfalls. See previous post to click on the instructions or cursor to the right side of my blog page and click under the heading "labels" - Waterfall Technique.


The most important component of this technique is that the strip needs to be 9 inches long if you are creating a standard size card (4/1/4" x 5 1/2") and the "mechanical" component of the strip that holds all the images need to be scored at 2", 2 3/4", 3 1/2", and 4 1/4". The width of the strip can be any length depending on the width of your images.

The pull tap is created using the Word Window Punch folded in half and inserted into the hole. A ribbon may be used as an option in place of the tab shown below.

This card shows the seasonal changes with the final image showing a snowman.