This blog site focuses on cards and projects utilizing materials and tools from various scrapbooking and paper craft companies.
If you are interested in cards and projects made with rubber stamps from various companies, please check out my other blog site "Stampin' Inspirations".


Come and join the Christmas Group Site on Paper Craft Planet
Click on the banner below


Thursday, September 27, 2007

I'm On Vacation Until Next Week Tuesday!!

Hey Everyone. . .I'm off. We're heading to San Francisco. I'll be back on Tuesday. My DH said I can't bring my laptop because he doesn't want to check in any bags. I suspect he doesn't want to carry my heavy carry-on with my laptop inside. Whaaaa! Bummers. I guess that means no postings or blog surfing until I get
back.

Well before I head out. . .here's a card and sketch to keep y'all entertained until I get back. I'll miss yah folks!
Until later. . .


Wednesday, September 26, 2007

Daily Special - Mini Accordion Album II

Goood Evening Everyone. Here is another mini accordion album that I created. Check out my previous post to see the other one that I made as well as my "Stampin Inspirations" blog site. I made one for that blog site using "Stampin Up" products.
What's great about this album is that it's cute but also very quick and easy to make. You can actually make this album in 30 minutes to an hour depending on how simple you create the design of your album. I wanted to keep the design of the pages consistent so it has a "theme" to it. I also wanted to keep the design simple so not to take away from the pictures which is supposed to be the focal point of an album. Again, I used primarily "scrap" designer paper and cardstocks to help reduce my scrap pile.

I didn't have enough of the 2 designer papers so I had to split them in halves and it worked out well. The papers constrasted one another really well. I'm slowly reducing my scrap pile. Yay!!

This is the album opened up accordion style. The design is really simple because I didn't want it to be too bulky and over power the pictures because the pictures are small to begin with. Remember the album is only 4x4".


This album is dedicated to my good friend Rita. These pictures were taken in 2003. We had a going away BBQ at my house and the pictures were taken in our backyard. My friend Rita and her family were moving to Tennessee and we had a little get together to wish them off. Rita and I met in college and despite the distance, we still keep in regular contact with one another. We usually talk on the phone or email one another. It was sad to see her move so far away but with real friends, distance don't really matter.


To the left is Rita and her husband. To the right is a picture of Rita's daughter and my dog Dakota kissing her. I really miss our house in Hawaii. We had a lot of good memories there. I especially loved our back yard. It felt really tropical, with a waterfall and all. It was sad when we sold the house when we moved to California. It's a good thing I love our house here in California, otherwise, I would have been REALLY sad.


To the right is a picture of Rita and her daughter and to the left is my cousin and my daughter.
Well, I'm off to San Francisco tomorrow. I'll bring my laptop and camera so I'll post pictures of our vacation. I can't wait. It'll be really fun!!
Hope to see y'all when I return. While I'm away, try out the tutorial and tell me what you think of it!!

Daily Special - Tutorial Day - Mini Accordion Album


Good Morning, Friends. Today's Daily Special is "Tutorial Day" I've been really neglecting the "tutorial" aspect of my blogs. I'll try to do one once a week starting after I return from my trip to San Francisco.
I've been on this weight loss journey and although, I have a very schizophrenic, disorganized, sort of flighty way of dealing with life, you know. . .jumping from one project, idea or task to another but I'm not not a multi-tasker. You know. . .I can't do different tasks at the same time. I can do it one at a time but not for very long because I get bored really quickly; thereby, I have difficulties finishing projects. I always do it sort of half way and move on to another, not really finishing a project completely. Are you thinking ADD? Ha!
Anyway, since going on my diet, well. . .my focus has been on just that, my diet, exercising, etc. . .unfortunately, crafting has become secondary. You may not think so because I blog and create stuff regularly. . .but believe me, I used to make a lot more things. I need to come to a happy medium.

Okay. . .enough of my rambling. Ha! Today's tutorial is "Mini Accordion Album". It's a really, really easy project. I saw this project in a book but it had no instructions. I looked at the pictures and realized how simple it was to make it so I decided this was great tutorial. As you should know by now, I'm on a mission to reduce my scrap pile and this project is a great way to reduce your designer paper pile. This album is 4x4" made with chipboard and if you have a lot of cut up designer paper, this album is small enough to accommodate smaller cuts of paper.

I made this album using only scrapbook paper and cardstock. I cut out the trees from the scrap paper and punched the snowflakes using cardstock. The only none scrap items on this album are the chipboard, ribbon and glitter. I did not have to cut up any additional paper or cardstock! Whoohoo!

I'm planning to make a whole bunch of mini albums to help reduce my scrap pile. I've been wanting to do this for a long time anyway. I love mini albums because you can give it away as gifts or bring it around with you and show them to your friends and family.


Anyway, this particular mini album focuses on our Christmas as a family. Unfortunately, I could not find a "group" Christmas picture of us after 2005. It sort of coincides with our move to California. I think now that our lives are settled, we'll start taking group pictures again this year.

I made another mini accordion album and tried to post it together with this album but I think I overloaded Blogger so I had to remove the other album. I'll post it on my next post.


Anyway, try out this easy project and tell me what you think. Okay.

Hope y'all have a wonderful day!

Monday, September 24, 2007

Daily Special - Project Reduce Scrap - #3 Fall Cards

Good Evening! Well here's two Fall cards I made again utilizing scrap papers and cardstocks. The card base is the only item that isn't a scrap item.

I'm having a lot of fun reducing my scrap pile. It's going to get harder when the cardstocks and designer papers become smaller and smaller. I'm going to have to get creative when that starts to happen.

Anyway. . .to create the speckled background, I used the SU Spritzer tool using SU markers in fall colors. I also smudged the edge using a sponge dauber and ink. I used the Kaleidacolor Autumn dye ink to create the spectrum type of coloring to the leaves. This was a really fun card to make. I'm really digging the fall colors.


Card Details:


Stamps: Printworks Thanksgiving BlessingsInk: Kaleidacolor Autumn, Copper Leaf Pen, SU MarkersPaper: SU Chocolate Chip, Really Rust, Forrest Green (unknown brand), DCWV Fall Stack
Accesories: Organdy Ribbon, SU Ticket Corner Punch, JoAnn Brads


Here's the other fall card I made using scrap designer paper and cardstock. Again only the card base is not a "scrap" item.

I created the speckles on the card base and the background image using the SU Spritzer Tool using various fall colors. The Kaleidocolor dye ink is a great ink pad to create multi-colored images.


I'm currently creating a mini album using my scrap designer papers. I'm going to do a tutorial on it. It's really easy and probably don't need instructions because it's that simple but for those who like to look at tutorials and want exact measurements, I'll post one for you folks. I'll probably finish up creating the tutorial tomorrow and post it sometime during the day if I have the chance to do so.

Goodnight, folks.


Card Details:


Stamps: Print Works Thanksgiving Blessings
Ink: Kaleidacolor Autumn, Copper Leaf Pen, SU Markers
Paper: Speckled White, Beige, SU Always Artichoke, Chocolate Chip, DCWV Fall Stack
Accessories: SU Color Spritzer Tool, Key Tag Punch, Satin Ribbon

Daily Special - Project Reduce Scraps - Day 2


Good Morning Folks! Here are two cards I made for my "Project Reduce Scraps". All of the items except the base card were all made from scrap items meaning already cut up cardstock and designer paper and open packs of embellishments and such.

I'm on a mission to reduce my piles of scraps and I'll continue this until I've reduced my pile somewhat. There's no way I'll ever reduce my pile completely but I would like to put a dent in them.

I had colored the flower images while on the airplane way back in April when I went on my trip to Washington DC and they sat in my drawer since then. I decided to pull them out and use them. The colors of the images were a bit dull looking so I added stickles glitter to jazz them up a little.

I have a ton of buttons that need to be used because I'd like to buy another pack in different colors but I won't do it until I use all of the buttons I already have.

Card Details:

Stamps: Rubber Stampede Stroked Daisy, Studio G
Ink: SU Cameo Coral, SU Watercolor Crayons
Paper: SU Cameo Coral, Green Gable, Autumn Leaves Designer Paper
Accessories: 3/4" and 1 1/4" square punch (photo corners), Foo-la-la buttons, embroidery thread, Making Memories Ribbon, Hemp cord, 1" and 1 3/8" circle punch, Marvy Round Corner Punch, Making Memories Eyelets


Here's another card I made using my scraps. Lemme tell yah, I probably could make a month's worth of cards and only reduce my scrap pile by half. I'll try to work faster than that. It'll be nice when my pile goes down.

I had opened a jar of chipboards by Making Memories I believe 6 months ago and I still have have a jar of chipboards. The chipboard images are really cute but all of the images are daisies, butterflies, and photo corners. How many cards do I have to make using the same images? A lot. . .so I guess I have to find many creative ways to use them in order to use up all the chipboards in this jar.

On to the next project. . .see you all later


Card Details:

Stamp: Rubber Stampede Stroked Daisy, My Sentiments Exactly Thinking of You
Ink: Lovely Lilac, SU Watercolor Crayons
Paper: SU Orchid Opulence, Lovely Lilac, Bordering Blue, DCWV Glitter Stack
Accessories: 1" and 1 1/4" round punch, Organdy Ribbon, Hemp Cord, SU Paper Piercer, Stickles Glitter, Making Memories Chipboard

Sunday, September 23, 2007

Daily Special - Project Reduce Scraps


Today's Daily Special is "Project Reduce Scraps". It's a new special I thought up. What is it? Well, yesterday as I was cleaning up my studio, I realized I had so many scraps. . .yah know, cut up designer paper, cardstock, die cuts and images, as well as opened packages of stickers and embellishments and so on. I need to seriously reduce my piles of scraps so I decided that I will go on a mission to not cut up anymore designer paper, not open another package of embellishments and stickers, not cut up any new cardstock until I reduce my piles of scraps.

Anyway, here is the first card I made using primarily scraps of stuff I had lying around. The only thing that wasn't a scrap item are the sentiment and ribbon. I stamped that image on to a scrap cardstock and added the ribbon.

We'll see if I can reduce my mess. This will be tough because I don't like to use materials of the same design consecutively in a row. I have this thing about not repeating my designs. That's the reason why I have so many scraps. Anyway, we'll see what I come up with throughout the week.


Card Details:
Stamp: Clear Expressions Friendship
Ink: SU Cameo Coral, Cool Caribbean
Paper: SU Cameo Coral, Cool Caribbean, Making Memories Designer Paper
Accessories: Sizzix Heart Die, Fiskar "scallop" scissors, 1 inch circle punch, SU double circle punch, embroidery thread, Darice rhinestones, Craft Narrows Ribbon, SU Key Tag punch

Random Cards - Halloween

Happy Sunday everyone! Wow, I'm up early for a Sunday. Do you folks go to church on Sundays? I'm catholic but I haven't been to church for such a long time. . .since we moved to California. I'm not sure why we haven't attended church. I feel a little guilty about it sometimes. Nonetheless, I think what matters most is that you live the life following the values or teachings of the bible.

Anyway. . .here's a few more Halloween cards I found tucked away in my drawer. These are "last years" cards. I have a lot of stuff tucked away in my drawers and closet. It's always a surprise, yah know what I mean.


I had stamped the image on to glossy white cardstock and colored the image with pastels and markers. I then covered parts of the colored image with Crystal Effects. Back then I used CE on many of my cards. The problem with CE is that it sometimes changes the color of your image when CE is applied. It takes on the "base" color of the color medium especially with markers.

What do I mean by base color? Well, all colors have a particular hue or tone. For example some reds have a pink tone, orange tone, etc. . .and when you apply the CE, it sort of pulls out the undertone and make the color more orange colored, pink colored, etc.

Anyhoo, hope everyone have a wonderful Sunday. I'm going to sit down and do some crafting before my family gets up and life gets busy again.

Saturday, September 22, 2007

Random Card - Look It's Bella

Good Morning Friends. I'm starting off early today. I plan to clean up my studio today so I won't have the time sit down and craft or blog until later this evening so I decided to start off early before life gets too busy.

Courtesy of lovely Tracy at "Tracy's Happy Place", I was able to make a card with a Bella image. Tracy sent me a stack of Bella images and well, Tracy you've just enabled me to buy a few of them. Ha!

I colored Bella with Prismacolor Markers and colored her skin with the Prismacolor Pencils. I added SU Crystal Effects to parts of the image to give it a 3D effect. Lemme' tell yah, it's hard to apply the stuff with itty-bitty images like Bella's bikini and shoes.

I'll be heading on vacation again at the end of the week. We're heading out to San Francisco this time. SF is my favorite city. I won't be bringing my craft stuff because there's too much to do in San Francisco and I doubt we'll have to many down times. I'll bring my computer and I'll blog a few pictures while on our trip. We'll be visiting the Winchester House - yah know the one with all the hallways and doors leading to nowhere. That'll be fun. We'll also be heading out to Sausalito. Anyway. . .hope everyone have a beautiful Saturday. It's overcast outside right now. . .I believe it's going to rain today. Yay!


Card Details:

Stamp: Bella, Studio G
Ink: Prismacolor Markers, SU Gable Green
Paper: SU Pretty in Pink, Gable Green, Whisper White, Autumn Leaves Designer Paper
Accessories: Hemp Cord, Grosgrain Ribbon, SU Key Tag Punch, 1 1/4" and 1 3/8" circle punch, Jolee Boutique stickers, Ticket corner punch, SU Crystal Effects

Friday, September 21, 2007

I've Been Tagged. . .

Hey Everyone I've been tagged by Gabby of "Confessions of A Stamper" and Tracy of "Tracy's Happy Place". This is a fun one so I decided to participate. . .

Four places I have lived:
1. Hawaii
2. Hawaii
3. Hawaii
4. California

Four places I have been on vacation:

1. Washington DC
2. Chicago
3. Colorado
4. Las Vegas

Four of my favorite foods:

1. Hot Crab Dip from Paliminos, Kincaids, and Ryan's Restaurant in Hawaii
2. Anything at the Bellagio's Buffet (Vegas)
3. Chicken Lau Lau
4. Cheesecake Factory Fresh Strawberry Cheesecake

Four places I would rather be right now:

1. Inside the Stampin Up factory
2. Bill Gates Bank Vault
3. Jared Leto's living room
4. Paliminos restaurant eating their hot crab dip

Four friends most likely to respond

I'll be back to fill in this one. . .I have to think about this part.

Until later folks. . .

Random Card - Halloween Card

Good Evening Folks. I was going through one of my drawers and look what I found. It's a card I made for Halloween last year. Interesting. . .

I remember fibers were popular a few years ago. I don't see it on cards anymore. I still like using fibers and I still use them on my cards.

I can't give the recipe for this card because I don't know what they are. My style of cardmaking hasn't changed much. One of things that have changed was that I heat embossed my images with embossing powders a lot more often and I used pigment ink regularly. I still love pigment ink because it's a lot more versatile than die ink and when heat sealed, it resist fading with time. It's also a great sticking agent for embossing powders because they dry slowly.

I have a few more Halloween cards I found in this drawer but I need to "update" them a bit. I'll post them later when I'm done. Hope everyone is having a great evening.


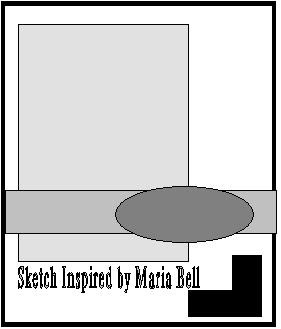
Here's the sketch for the card.

Thursday, September 20, 2007

OMG. . .Check out what I received in the mail today!!!

My husband brought me the mail today and WOW!! I received some very important things. Important because they were given to me purely out of kindness.

This card is from Tracy from "Tracy's Happy Place". I had mentioned a few post ago that I did not own any "Bella" stamps and she was kind enough to send me a bunch of "Bella" images and this absolutely beautiful card and I mean BEAUTIFUL! The picture does not depict the real beauty of the card in person.

Tracy, I have to say has been so supportive of my weight loss journey. Whenever I felt down and discouraged, I would receive a note from her encouraging me and making me feel better. I cannot express how grateful I am for those little acts of kindness which in my opinion, means more than just a note of encouragement. Thank you Tracy for being such a wonderful person. I will definitely make use of those Bellas.


This card was sent to me from Malieta at "Life's Simple Pleasures". It's a thank you card in return for a birthday card I sent her. She is such a sweetheart and I absolutely love, love her card. As you can see, she is very talented. The picture cannot demonstrate the true beauty of the card in person. Malieta is always there commenting my blog site and believe me, it makes me happy to see her notes whenever she comments. It's very encouraging and makes crafting and blogging so fulfilling.

Thank you Malieta for you kindness. I'm glad you had a wonderful birthday!!!


This group of yummy goodies were sent to me from Joyce, a friend I met online. She sent them to me for no reason but "just because". Joyce lives in Oregon and I've never met her in person but she's like a real friend. She loves to do crafting and wanted to share a few of her things with me. Oh wow, she's fabulous! I can't wait to make some stuff with these awesome products.

Thank you Joyce for your kindness. I want you to know that I really, really appreciate your friendship.

I'm so lucky to have met such nice people online. I mean I've never met these ladies in person but their kindness are very apparent. I've never imagined that I could meet such wonderful people all over the US and Canada. Blogging has been such a wonderful experience. Thank you ladies for being such wonderful friends!!

I have to thank these ladies in private later this evening. I have to head out to tennis lessons right now but I just had to show off these AWESOME stuff I received from these fabulous ladies before I walked out the door!!

Bookmark and Metallic Rub-ons


About a year ago I had purchased a set of coloring mediums called "Metallic Rub On". Basically, it's creamy paint mixed with a metallic type of compound that makes it appear metallic when applied on to cardstock or your art work. Anyway, I really didn't know how to use them; therefore, they sat in my drawer.

I decided to use them because well. . .I bought them and I really hate wasting my money. I need to look up on the Internet samples of projects created using metallic rub ons because I'm sure there's techniques for this product. I just don't know what they are right now.

Not knowing how to really use them, I decided to rub it on a stamped image. I basically stamped an image and heat embossed it with black embossing powder. I then rubbed the colors on to the image. When I was done, it actually came out okay. It has a very metallic shiny appearance to the image. I sealed the color medium with art sealant so it wouldn't rub off and decided to create a bookmark.

Bookmark Details:

Stamp: Stampendous Clear Stamps
Ink: Versamark ink, Craft T Rub-ons, Copper Leaf Pen
Paper: SU Copper Metallic Cardstock
Accessories: JoAnn Brad, Bookmark tassel, multi-colored fibers

This One is For You, Jen. . .What the Heck Does "Emo" Mean?

Several people asked me what "emo" meant - referring to the pictures of my daughter in the previous post. I had stated that I was trying to achieve an "emo" look when I took the pictures of her. If you have a teenager, you'll probably know what I'm talking about.

"Emo" technically refer to a genre of alternative/rock music called "emotive" but depending on who you ask, it's become a mainstream reference to "emotional", moody looking teenagers full of melodrama and demonstratively exhibit their feelings through their makeup, clothing, and moody, sad looking faces. For some, they see it as sort of a softer version of "goth".

My daughter loves "garage" non-mainstream alternative music and is not into goth or emotive type of music and she wants to make it clear that y'all know that. So. . .I'm making sure I get the message out.

In the general sense, you can refer to someone as being "emo" if they appear to be grumpy, sulking, or moody. When I'm in a bad mood, my kids sometimes call me "emo". LOL! In the artistic stand point, the "emo" look is also a fashion statement of sort. . .heavy eyeliner, funky clothing, dark hair, and pale faced. It's the suburban white middle class "soft" version of goth. Kids who are not goth but want to dress like them.

Here is a band that is well known to be categorized as an "emo" or "emotive" band when technically, they're not, check it out:


Hope this answers your question. . .have a good day, everyone!!

Tuesday, September 18, 2007

Altered Tin With Accordion Album

Whew. . .I actually completed this project tonight. I started this afternoon but kept putting it off because I didn't know where to start. I've recently started scrapbooking and it's a little difficult for me to create a layout without it looking like a card. I guess it's the same concept but I feel scrapbooking is a little more complicated. My problem is deciding whether I want the layout to be busy with all sorts of embellishments or make it simple. I see a lot of scrapbook pages with all sorts of embellishments and complicated layouts and I really like them but when I do it, it kinda looks messy or cluttered. It's the card-maker in me fighting against it.


Remember the DVD size tins that I had bought at Big Lot for a dollar each a few weeks ago and had altered for one of my TICs (Tuesday's Inspirational Challenge several post back). I had planned to create an accordion album for it and just today I decided to finally sit down and make it.


The photos are of my daughter. I know, I know. . .she has a ton of make-up on. My husband isn't too thrilled about it. She typically don't wear make-up but I had asked her one day to be my "subject". I wanted to take "artsy-fartsy" types of photos of her. My daughter really loves listening to "garage alternative bands". . .you know, non-mainstream undiscovered bands. Well I wanted to create the "emo" look so I put make-up on her and the photos I took of her were primarily with her not smiling and looking "emo". For this album I chose a couple with her smiling.


I'm planning to create a "rock-n-roll" themed album with the "emo" pictures I took (similar to the last picture). You'll see what I mean when I create the album.


I actually like this picture of my daughter. I love her smile.


I took this picture while she was "whooshing" her hair from side to side. I have a bunch of pictures with her hair in mid air but this one was the more "mellow" shots This suppose to look sort of like a fashion shot. Looking at it now, it sort of looks a bit provocative but that wasn't the intention. Oops. . . remember. . .the pictures are suppose to look artsy-fartsy.


This picture below is the "emo" look I was trying to achive with most of the shots I took. I like it despite all the make-up. It's okay. . .my daughter is 16 years old. She never wears make-up. . .my husband won't allow her to wear make-up but I don't think there's anything wrong with wearing make up especially when it's for fun. Anyway, I'll stop apologizing. I think the pictures look "cool".

Anyway, I really like how my album turned out. I think I balanced simple and busy and ended at a happy medium. I'm excited to make more of them. Stay tuned.

Album recipe:


K&Co Chipboard Stickers, JoAnn Brads and Eyelets, American Craft Elements Ribbons, Sizzix Folder Die, DCWV Textured Cardstock, SU Bashful Blue, Close to Cocoa, Autumn Leaves Designer Paper, SU Key Tag Punch, Slit Punch, Word Window Punch, 1" 1/4"square punches (photo corners), Fiskar's "Cloud Scissors, KiCreations Tin Containers, Sakura Gel Pens, SU Classic Ink (Close to Cocoa, Baroque Burgundy, Bordering Blue)


Last Call - Blog Roll in Progress

Hi Everyone!! I'm slowly creating my Blog roll so not to worry if you don't see your link on the blog roll! If you want your blog site on my blog roll, comment this post. Anyone who had commented on any of my previous post will be added. If you've never commented on any of my posts for this blog site, be sure to add a comment on this post so I have a reference to use as I continue to create my blog roll.

Hope everyone is having a great evening!!

In the meantime. . .

Hi Everyone. . .just working on a few projects right now. If I finish it today, I'll post it this evening.

In the meantime. . .here's a song you can listen to. Check it out. . .

Sunday, September 16, 2007

Daily Special - Christmas in September

Yo! Everyone!! Check out this stamp. It's pretty funky. I had bought it on Ebay long, long ago and I initially thought wow, what a weird group of snowmen. . .especially, the first one. . .her hair looks rather "fried". . .she needs to see her hairdresser.

It's a stamp from some obscure company. I initially thought to myself . . ."why did I buy this stamp?" but it's grown on me. . .I actually think the snowmen are cute now and really glad I bought the stamp.

I colored the images using the Prismacolor markers then applied SU Crystal Effects. Do anybody still use dimensional glazes on their cards like Crystal Effects? I love the stuff. I like how it makes the images 3D looking and shiny. It's also a good way to cover ugly coloring. Haha! If your coloring turned out a little messy, just add a dimensional glaze over it and it actually looks okay after you apply it. To create the 3D snow, I used Liquid Applique and puffed it up using a heating tool. Before heating it, I added glitter to it while it was still wet. It's amazing that the little things you do to a card can add "excitement" to what would have been otherwise a drab looking card.


Card Details:

Stamp: Imaginations 0841, Inkadinkado Christmas stamp set
Ink: Prismacolor Markers, SU Pixie Pink
Paper: DCWV Square Scallop cardstock, Provocraft Christmas Stack, Mint (unknown) SU Whisper White, Pretty In Pink,
Accessories: Grosgrain ribbon, SU Crystal Effects, Liquid Applique, Clear glitter, JoAnn Brad, SU Ticket Corner Punch

Saturday, September 15, 2007

Random Card - Last Card of the Day


Amazing. I actually made 4 cards today. The other two are posted on Stampin Inspirations if you want to check it out. The third card is posted below (see previous post). That's pretty good by my standards. I know some of you can whip up a lot of cards in a day but lately, I've been so slow that even making one card a day has been a challenge.
This card was created using Heidi Grace stamps again like my previous post but the sentiments are by Studio G. Both brands are clear stamps. I know this card is a bit busy but I wanted to add a few extra elements. I like how it turned out.
Anyhow, this is the last card I'm going to make for the day. I haven't been feeling well because of this stupid cold I have but making cards today really helped me forget about being sick.


Card Details:

Stamps: Heidi Grace, Studio G
Ink: Bordering Blue, Lovely Lilac, Green Galore
Paper: Bordering Blue, Lovely Lilac, White Confetti, Autumn Leaves Designer Paper
Accessories: Ticket Corner Punch, Oval Punch, JoAnn Brads, American Craft Elements Ribbons, Silver Metallic Cord


Daily Special - Featured Stamp - Heidi Grace


Good Evening Everyone. . .today's Daily Special is Featured Stamp. The featured stamp is Heidi Grace stamps. I believe Heidi Grace is a brand of clear stamps by Fiskar. Heidi Grace also has scrapbook products which are pretty nice. The products are sold at JoAnns.

Anyway, the stamps are really nice but I think they are coordinates for primarily scrapbooking. I notice that a lot of the stamps that are clear stamps are made for scrapbooking and not necessarily for card making. Why do I think this . . .well, because the sentiments seem to be more of what you would use as titles for photos or themes for scrapbooking such as "explore", "adventure", "friends". . .you know, one word titles rather than verses.

I've had a cold for the past few days and funny because I've been stamping and making cards more so than I've had for quite some time now. I think because it keeps me from focusing on my cold. When I'm crafting, I sort of forget that I'm not feeling well. Hopefully, my cold symptoms go away soon. I don't like feeling sick, well. . .who does, right? Today my cold symptoms have lessened quite a bit from yesterday. Thank goodness. I think the zinc lozenges are working. I've also been taking "Airborne" and in combination I think they've helped to minimize the cold symptoms that could have been worse.


Card Details:
Stamps: Heidi Grace Wild Daisy and Urban Access
Ink: SU Cameo Coral
Paper: Cameo Coral, Certainly Celery, Autumn Leaves Designer Paper
Accessories: SU Crafters Tool Kit, Making Memories Ribbon, Foo-la-la Buttons, Organdy Ribbon, SU Key Tag Punch, 1/2" and 1" square punch (photo corners), Fiskar "scallop" scissors

Thursday, September 13, 2007

Daily Special - Polished Stone

Good Morning Everyone! I started off early today! AWESOME. The first thing I did today, besides dropping my kids off to school, was to sit down and make a card and actually finish it before doing something else. I always do everything else first and before I know it, it's 10:00 at night and I haven't sat down to make a single card. Sometimes throughout the day, I'm able squeeze in time to start on a card then finish it up at night.

Anyway, enough about my life. . .the background of this card was created using the "Polished Stone" technique. I've been having fun using this technique. It's a great way to make a beautiful, elegant background. Here is a tutorial I did on the "Polished Stone": Click here for the tutorial. The tutorial is also on SCS.

I stamped the image on to a white glossy cardsotck and with a sponge dauber I filled in the color of the flowers. It was a quick and easy way to color in the flowers. I then took a marker and colored in the leaves. After everything dried, I went back and sponged in a subtle color to the background so it won't look so "white".

I'll try to sit down later today and make another card or maybe start on a project. I'm sorry I haven't been creating any new tutorials but I just can't find the time right now.

Until later. . .


Card Details:
Stamps: Julep Floral, Studio G
Ink: Lovely Lilac, Orchid Opulence, Prismacolor Marker, Lavender Lace and Old Olive Reinker
and alcohol
Paper: Glossy White Cardstock, Lavender Lace, Old Olive
Accessories: Textured Trios Riboon, 1" and 1 1/4" punch, Sakura Souffle Opaque Pen, Making Memories chipboard photo corner
Technique: Polished Stone

Wednesday, September 12, 2007

Another Christmas Card


Good Evening Everyone! This will be my last Christmas card for a few days. I'm just trying to stock up on my Christmas cards before it gets too busy and I won't have time to make them.

I wanted to create a simple design because I really like the designer paper and didn't want to cover it up with too many layering. The stamp image again is by TAC. . .check out Jen's "Pieces of Me" if interested in TAC stamps.

I colored the image with Prismacolor Markers and applied SU Crystal Effects to give a 3D appearance. That's about it. I rarely make simple cards because I'm so accustomed to layering and adding all sort of stuff to them. I kinda like the simple look and it's much faster to make. It's also nice to show off the paper rather than covering it up all the time.

Hope y'all are having a nice evening.


Card Details:
Stamps: TAC Gifttags, Stampin Up Warm Words
Ink: Prismacolor Markers
Paper: SU Old Olive, Taken With Teal, Provocraft Holiday Stack
Accessories: JoAnn Brads, SU Crystal Effects

Tuesday, September 11, 2007

Clarification of My Previous Post

Good Evening Everyone! Here's a card I made this afternoon using "The Angel Company" stamp set called "Gift Tags". I bought the stamps from Jen at "Pieces of Me" who is a consultant for TAC. The sentiment is by Inkadinkado.

I colored the Santa image using Prismacolor Pencils with Gamsol and colored the frame with Prismacolor Markers and applied Liquid Applique on to Santa hat. I also applied Crystal Effects by SU on to the candy stripe framing around the Santa. The rest of the card are basically layering and adding a few design elements.


I removed the two previous commentaries I posted because I was concerned that I may offend people. People sometimes are sensitive to controversial subjectsand are easily offended. I've seen a bunch of blogs that discuss sensitive subjects and people become really passionate about it.

I recently visited a blog site and the owner basically dissed Stampin Up. Interestingly, the person began to receive "hate" comments which I found to be quite ridiculous. . .sheesh, it's about rubber stamps. There's no need to hate. Anyway, I'd hate to receive hate mails.

Card Details:


Stamps: The Angel Company Stamp, Inkadinkado
Ink: Prismacolor Pencils with Gamsol and Prismacolor Markers
Paper: Provocraft Designer Paper, SU Garden Green, Real Red
Accessories: Box of ribbons (Christmas), Fiskar "Scallop" Scissors, Liquid Applique, SU Crystal Effects, SU Round Tag Punch