Word Window Christmas
I actually had a great time making these cards.

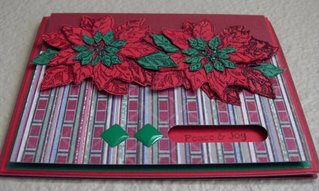
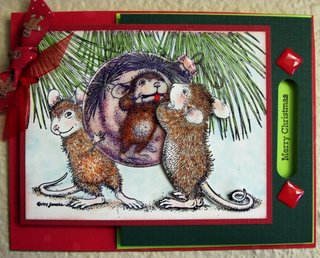
Making these two word window cards wasn't difficult but it was time consuming because of the work on the Poinsettia. Instructions below will be primarily on how I created the poinsettia. The picture is sort of self-explantory in regards to the rest of the card. If you have any questions, feel free to email me and I will gladly answer your questions.
Instructions for the Poinsettia:
Tools and Materials
Stampin Up Poinsettia Greetings stamp set
Red Cardstock
Green Cardstock
Scissors
Glitter
Stampin Up Borque Burgundy craft ink or any burgundy pigment ink
Stampin Up Forrest Foliage craft ink or any dark green pigment ink
Clear glitter embossing powder
Heating tool
Green Ice stickles (glitter)
Foam Tape
Instructions:
- Rubber stamp 4 images of the poinsettia on red cardstock using Stampin up Borque Burgundy craft ink or burgundy pigment ink
- Cover all the images with clear glitter embossing powder
- Heat with heating tool
- Set aside to cool
- Cut out along the edge of the inner row of petals of the poinsettia- doing this with two of the images
- Adhere the cut image on to each of the two other uncut images with foam tape
- Rubber stamp the poinsettia on green cardstock using the Stampin Up Forrest Foliage craft ink or green pigment ink twice - it's not necessary to ink and stamp the whole image, just as long as the most inner petals and berry image are stamped. As an alternative you may use a green embossing pen to ink the stamp image at the inner most row rather than inking the whole image.
- Apply clear glitter embossing powder and heat
- After cooling, cut out the most inner rows of petal and glue on to the duplicate image of the poinsettia mages on the red cardstock.
- Repeat the process with the other green poinsettia to create two completed poinsettias for the card
- Apply dots of green glitter on to the center of the poinsettia
- Adhere the completed flowers on to a designed base card
- Cut a few of the outer petals of the green poinsettia image and adhere between petals of the completed poinsettia as shown in the picture.
Be creative with the background. Each person has their own unique style of creating a card. Personally, I like using scrapbook paper for my background because it adds vibrant colors to a card design that rubber stamped backgrounds cannot duplicate. Furthermore, it's a fast and simple way to create a beautiful background.

The Stampin Up word window punch is a cool tool.
Technique using the Window Word Punch or any shaped punch.
- Punch your cardstock using the Word Window Punch or shaped punch. The Poinsettia cards were punched with an oval punch.
- Behind the punched window, stamp a sentiment on a different colored cardstock and attach to the punched cardstock so the sentiment appears through the punched window.
- To give it a bit of dimension, mount the punched window with foam tape as shown in my sample cards.
Have fun creating!!
Until later. . .


No comments:
Post a Comment