Daily Special - Technique Day - Coloring With Pencils
I'll do a Daily Special today and it's "Technique Day" - Coloring with pencils. I used a very cheap pencil that I recently bought at Michael's. This set of 24 was only $12.99. Prisma color pencils are $48 I believe for a set of 24 so a $12.99 set is considered very cheap. These pencils are made by Koh-I-Noor. This set of pencils are softer than other lead pencils so it was easier to blend with them. It didn't take as much work to blend as the harder lead pencils.
Here is a basic tutorial on coloring:
I used a regular matte cardstock to stamp my image.
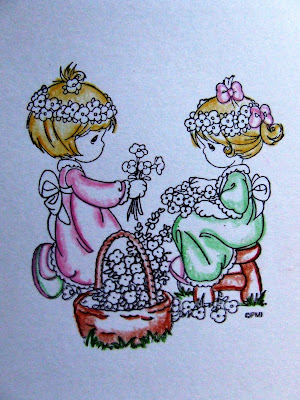
First step: Outline your image. Save the detailed parts of the image for last.
Step 2: In a circular motion, from the outline inwards, color in the image using a small amount of pressure. Don't color in a straight up and down motion, circular strokes are best. Don't worry if your coloring don't look that pretty. This is just the base.
In my example below, my light source (in my mind - not literally) is slightly above and centered on the image, therefore the highlights will be at the center. Does it make sense?
When coloring hair, color the outline and slightly outside of the outline but don't color the whole head of hair. It's even okay to leave some parts of the hair uncolored - just fade out your coloring as you head towards the center. Hair at the top of the head is usually lighter than the bottom so color those areas accordingly.

Step 3: Sorry but the picture is blurry. Now, with lighter pressured circular motion, continue to color inwards from the originally shaded areas. Color the shaded areas as well, blending the colors in, but while you're coloring inwards from your outline towards the center, place less pressure on your coloring strokes. The lightest strokes are reserved for the center . . .barely color in as you head towards the center.

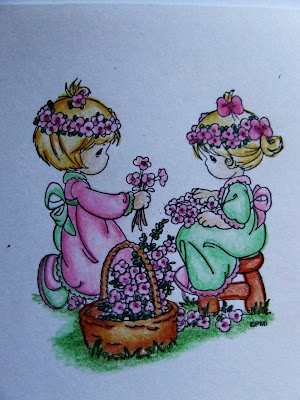
Last step: Color in the detailed parts of your image. For flowers, color the center and under the flowers darker than the outer parts of the petals (in real life, the outer parts of the petals are exposed to the sun, therefore would be lighter than the inner portions of the flower). The same applies to leaves, as well as ribbons.

The key to coloring is your strokes and ability to add shading and highlights. Apply more pressure to your coloring for shaded areas, lighter pressure in highlighted areas. Always use circular motion to color and blend the colors in very well.
I used two types of brown for the basket and the stool. One lighter and the other a darker shade. I mixed and overlapped the lighter color with the darker color to prevent an obvious demarcation between the two colors.
Practice, practice, practice. . .it takes a while to get good at it but once you are able to control the amount of pressure applied to your coloring strokes, you'll get the results that you want.
<<>
That's it. Hope this tutorial helps a bit with coloring.
Until later. . .


7 comments:
Maria - thanks for sharing your techniques on coloring - this is one skill that i'm not good at, and appreciate your detailed descriptions of how to do it to get that great look. also look forward to your write-up on the gamsol/stumps technique and whether or not its really necessary. like you said, its easy to get caught up in all these expensive tools and supplies and maybe its not necessary to still get a great look. thanks for sharing- i enjoy your blog and actually just subscribed to your _other_ blog (didn't know you had two). have a great day!
What a great thing to hightlight in your blog! I need to practice this. While coloring may seem basic to most, I have a hard time making my coloring look like yours. thank you so much for this! I will be practicing!!!!
I have read countless tutorials on using coloured pencils and Gamsol and have been practicing for some time now. But YOUR tutorial is the easiest to follow and shares some advice not seen on others. Once again, thanks Maria.
I've been to your site a million times and just discovered this section. I'm so busy looking at your awesome and beautiful cards, that I didn't notice this section. Well I found it and it is a blessing! I have been practicing on my watercoloring. I brought cheap pencils until I get the technique perfected. I waste enough money as it is and I didn't want to buy a expensive set and ruin it. Anyhow, I am so gratedful for this tutorial becasue I see MY mistakes and I understand about the "highlighting". I'm going to mark this section of your blog as a favorite also. I learn something new almost everyday!
I don't want to "talk your head off" continue to enjoy your vacation.
Sincerely
Malieta:)
This tutorial was sooo helpful, explained so well, I can't thank you enough. I had no idea of this technique, and now I do. Only I forgot to buy the gamsol today :(. Can't wait to try it, colouring is something I love. :)
Thank you for this tutorial. I'll be back.
Wow, thanks for sharing. I love it.
Vera
Post a Comment