This blog site focuses on cards and projects utilizing materials and tools from various scrapbooking and paper craft companies.
If you are interested in cards and projects made with rubber stamps from various companies, please check out my other blog site "Stampin' Inspirations".


Come and join the Christmas Group Site on Paper Craft Planet
Click on the banner below


Wednesday, January 31, 2007

Closer View of the Pictures

If you want a closer view of the pictures, click on the picture and you'll have a MUCH larger view of it. I kid you not! It's huge but this can be useful if there's a part of the card that may not be as clear because of its size and you wanted to see it in closer detail. Try it out and you'll see what I mean.

Goodnight folks, I'm going to bed. . .

Daily Special - Technique Day - Poppin' Pastels

Today's Daily Special is Technique Day. I chose Poppin Pastels because it's a simple technique and the results, although simple, are very pretty. Click Here for the tutorial or click on the title of this post to be linked to the tutorial.


I dressed up the cards a bit because I just can't help myself. You can't see it the picture but I attached a sun shaped charm to add a metal contrast to this card.


Card details:


Stamp: Hero Arts Long Stem TulipPaper: Stampin Up Mint Melody, Lovely Lilac, Close to Cocoa, and Lavender Lace, Provocraft Scrapbook Paper
Ink: Stampin Up Pastels, Versamark inkAccessories: Sun shaped metal charm (don't know the brand), Lavender organdy ribbon, and paper cord


Card Details:

Stamps: Hero Arts Long Stem Tulip, CTMH set (don't know the title), and Stampin Cute Converse
Paper: Stampin Up Lavender Lace, Glorious Green, Orchid Opulance
Ink: Stamin Up pastels and Versamark Ink and Green Galore
Accessories: Lavender eyelets, Lavender organdy ribbon

Tuesday, January 30, 2007

Why Do I Have Two Blog Sites?

Someone asked me why I had two blog sites. . . .well, I actually started off with only one - this one but I become a Stampin' Up Demonstrator. . .again. . . in December. I was previously an active demonstrator but became inactive when I moved from Hawaii to California. I didn't feel ready to start up again until December and now, I'm having a blast.

I made the decision to create another blog site that concentrated on Stampin Up only. The other blog site "Stampin Inspirations" is the blog site I would give out to my Stampin Up customers. I want the focus to be on Stampin Up so customers and others can see cards and projects created with their products alone. My Stampin Inspirations blog site is sort of a teaching tool for customers. If you like Stampin Up products. . .take a peek at that site, there's tutorials, projects, and cards that are unrelated to this blog site.

I do have other stamps besides Stampin Up and really like many of them. There's also a lot of flexibility using other products so I kept this blog site for my other stuff! I love all brands of rubber stamps and products and just because I'm now a demonstrator, it doesn't mean I need to give them up - just not mix them together! I mean it would be very difficult to sell a product by Stampin Up if a customer sees a card I made with another brand and prefers that product or rubber stamp.

Anyway. . .just an FYI for those who wondered why I'm maintaining two sites.

Until later. . .

Daily Special - Anything But Cards - Cocoa Pocket Card


Okay. . .I've decided that my long tutorials will be created as a link to my web page as opposed to directly on my blog site. Because of the size of the files, it takes fooooooooooorever to upload the photos.

I love these cocoa packet because they are easy to make and you can add any sort of packets. I used cocoa packet because they do fit well into the pocket and I happen to have them as a left over for Christmas.

Pictured are cocoa packets I made for Christmas as well as Valentines.


Click Here

to be linked to the tutorial!


Try it out and you'll see how easy it is to create them! What's great is they are reusable. Your recipient of this card can add a new packet when the present one is removed. This is great for party favors! Have fun creating. . .

Until later . . .

Blogger is giving me a hard time

I've been unsuccessful in my attempts to post a tutorial on my cocoa pocket card. It's running so slow that I gave up and will try again later. Check back later for the tutorial. Hopefully, Blogger will give me a break.

Until later!!

Monday, January 29, 2007

Daily Special - Product Review - Heidi Swapp Edge Distresser

One of the responders to my survey said she would like to see more "product reviews" and I agree. When I first started this blog, I did a few reviews but I haven't done one for a while.

Okay. . .if you like to distress your designs and giving them a shabby chic, aged appearance. . .Heidi Swapp's Edge Distress is a must.

I've used Making Memories, generic sanding blocks, etc. . .and man, it would take a lot of sanding to create what this little tool can do in one swipe. Forget sanding - this edge distresser is awesome!

You can find this distresser at various websites - just google "Heidi Swapp" and there's a bunch of online stores that sell it, as well as Ebay. Shop around but typically, it cost from between 99 cents to $1.49. Here's a great online scrapbook store - Croppin' Paradise - that sells a bunch of Heidi Swapp items including this edge distresser.

Several of my cards that have a distressed appearance were created using this edge distresser. My previous post (Daily Special - Anything but Cards - Buttons and Daisies) shows one of my designs using this distresser (the card box).

Try it out. . .I'm positive you'll love it!

Until later. . .

Daily Special - Anything But Cards - Buttons and Daisies Cards and Box

I wanted to create a boxed series of handmade cards and this is my first series called "Buttons and Daisies".

Can you believe the stamp is from some sort of obscure company that I've never heard of! The company is called "the Artful Stamper".

I colored the daisy with Radiant Pearls, covered it with glitter clear embossing powder, heat embossed it, cut out the image and mounted them with foam tape. The leaves were created with the daisy petals. Basically I stamped the daisy image and colored it with the green Radiant Pearls, cut them out and whala! they look like leaves. Sometimes you just need to improvise.

Another improvisation was the little daisy on the box. I actually drew it myself because I didn't have a smaller version of this stamp. Luckily, it wasn't a complicated drawing. Sheesh, if I had the time, I probably would draw my own images but yuck, that would take too much effort.

To highlight the petals, I colored them with white acrylic paint. Dye inks or pastels would not stick to the surface of the embossed images . The acrylic paint worked perfectly. Like I said. . .sometimes, you just need to improvise and come up with something else in order for things to work. I'll take pictures of each card and post it on a new post later today - just so you could take a closer look at them. I'll post the sketches I used to create the cards. . .courtesy of Page Maps. . .the link of the website is at the top of my blog site!

Until later. . .

Sunday, January 28, 2007

Tell Me About Yourself!!

I'm interested about you! Please answer the questions below. . .click on the comment link at the end of the post to comment or email me at lbmcd66@hotmail.com with you answers. If you are planning to email your response, copy and paste the questions to your email and send it out!

For those who respond, I'll pull your name out of a hat and I'll send a Valentines Goodie Pack to the winner(handmade cards, spool of ribbon, rubber stamp, scrapbook items, and other items) - drawing will be done on February 3rd and will be sent out on February 5th. Check back on February 3rd for the posting of the winner!! I'll also contact the winner via email.

Name _____________

1. How long have you been rubber stamping?
2. How often do you rubber stamp or make cards ( i.e, daily, several times a week, a few times a
month, etc.)?
3. What is your favorite rubber stamp brand (Stampin Up, Stampabilities, Inkidinkado, CTMH,
etc.)?
4. How long does it take for you to make a card ( 15 min, 30 min, 1 hour, etc.)?
5. What is your favorite technique?
6. What would you like to learn more about?
7. What do you consider yourself: rubber stamping addict, moderately addicted, occasional
stamper, not really into it, wannabe?
8. If employed what is your profession?
9. Are you registered with SCS or do you just lurk their site?
10. Do you have a lot of stamping buddies? If you do, do you get together regularly?
11. Do you spend a lot of money on rubber stamping. . .more than you should?
12. What's your favorite TV show?
13. What is your favorite movie?
14. What genre of music do you like to listen to?
15. Do you have a blog site or website? If yes, what is your blog or website address?
16. What is your favorite rubber stamping website?
17. Do you have other hobbies?
18. Are you a Stampin Up demonstrator?
19. What sort of posts would you like to see more on my blog site?
20. What city and state do you live in?


Okay. . .I'll answer the questions myself. . so you can get to know me

1. Will be making 4 years on Mother's Day so I say approximately 4 years.
2. I rubber stamp daily ( I take days off once in a while)
3. Stampin Up, House Mouse, and Penny Black
4. Typically, 30 minutes to an hour.
5. Heat embossing.
6. Hidden messages, slider cards, pocket cards, and anything but cards techniques.
7. I'm not ashamed, I'm seriously addicted to stamping!!
8. Currently, I'm a SAH mom but professionally, I'm an RN.
9. Yes, I am registered with SCS.
10. Not many because I just moved into my community about 6 months ago. I have online
stamping buddies. I do get together with my Stampin' Up upline once in a while.
11. Yes, I spend way way more than I should.
12. I love CSI, Supernatural, Court TV
13. Crash, Cider House Rules, House of Sand and Fog, and any Indie and psychological thriller.
14. Alternative rock, Indie music
15. I have three blog sites (this site, Stampin Inspirations, Reflections and Perspectives and a
Stampin Up Related Website - links also located at the top of my blog site)
16. Aside from SCS, I currently love Page Maps (link located at the top of my blog site). It
changes depending on my needs.
17. Charcoal and pastel drawing, sketch, photography
18. Yes, I'm a demonstrator.
19. Ummmm. . .
20. Temecula, California

Now it's your turn!

Until later. . .

Daily Special - Fun With Words - Alphabet A

I made 2 other cards like this for a swap group I'm in but I forgot to take pictures of them. This is such a great idea to use my sentiment stamps to go with an alphabet. I had a Daily Special - Fun with Words. . .I'm not sure if I removed it and changed it into some other special. If I did, I think I'll add it back on. I have tons of sentiment stamps that I don't use. I have a tendency to use ones that are right in front of me or easily accessible. . .if it's at the bottom of a pile, it never see the light of day!

Until later. . .
Saturday, January 27, 2007

Look At Phoenix. . .He Looks Like A Bear

Look at my dog Phoenix, he looks like a bear. I don't normally post anythng personal but I couldn't resist. I had to post a picture of my dog.

I gave him a bath this evening and it took my daughter and I over an hour to blow dry his hair. Can you believe it? But. . .it was all worth it. He looks so cute now.

He needs a haircut but it's been really cold lately and we felt that he needed his coat for a little while longer. Phoenix is a Bischon but we don't like the helmet head look that most Bischons have. We prefer him fluffy. . .like a fat bear.


Correction on the Joseph's Coat Tutorial

I just realized after reading the tutorial that I made a small mistake on the instructions. When using the embossing buddy in Step 3 of the tutorial, you'll need to rub it on to the multi-colored cardstock before you rubber stamp the image. The correction will be made on the post but you will not be receiving an updated version via email.

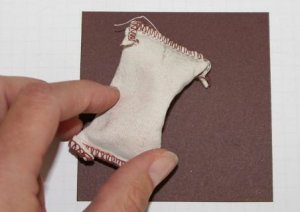
What's a embossing buddy? For those of you that don't know what that is. . .it is a dusting powder contained around a porous cloth, when rubbed on to the surface that you are working with, it prevents embossing powder from sticking on to it. You can then rubber stamp over it and when applying the embossing powder, it will only stick to your stamped images.

Sometimes when using the embossing buddy, you will need to tap it on to the cardstock to release a small amount of powder from the cloth. Most times, you'll just need to rub lightly and the powder is released.

This is an embossing buddy:

Friday, January 26, 2007

Daily Special - Technique Day - Joseph's Coat


I'm doing Tuesday's Daily Special - Technique Day . . .well, because I wanted to. I'm not following the schedule anyway as much as I would like to stick to my own schedule. I've never been an organized person. I have at least 4 organizer/daily planner and I plan on a daily basis but never, ever follow my own plans. I'm not sure why I have a planner - it's sort of a fetish of mine. . .I buy journals, planner, organizers but never use them. I have a dozen journals that I've written entries for about a week and I'll buy new ones. Isn't that weird?


Anyway, this technique is called "Joseph's Coat". I'm not sure why it's called that. I've been using my brayer a lot these days! Here is another variation of the previous brayer technique that I posted several days ago.

Materials

Brayer
Spectrum or Kaleidocolor multi-color dye ink pad
Stamp
Embossing buddy (not shown in the picture)
Embossing tray
Clear embossing powder
Single colored dye ink pad (darker than the colors on the multi-colored dye ink pad)
Versamark
White Glossy Cardstock


Step 1 - Ink your brayer with the multi-colored ink pad and roll it on to the glossy card stock covering the cardstock completely. You may have to repeat reinking and rolling the ink several times.


When done, you should have a rainbow colored background similar to the photo below


Step 2 - Rub the embossing powder over the colored cardstock (not pictured), ink your stamp with the Versamark ink and stamp on to the colored cardstock .


Step 3 - Apply clear embossing powder and shake off the excess then heat emboss. As a note. . .the embossing buddy in step 2 prevents excess embossing powder from sticking to anything else but your stamped image.


Step 4 - Ink a clean brayer with the single colored dye ink and roll across the embossed image. Continue to ink and roll over the image and cardstock until completely covered. In this case, I didn't use a dark enough single colored dye so a little bit of the multi-colored ink continued to show.


Step 5 - Clean off ink that was applied on to the embossed image using a q-tip.


This is the result of this technique. I created 3 different colored design. As you can see, the darker the single colored dye ink, the more the embossed image shows up.

Step 6 - Finish up your card as you normally do.
That's it! Click on the title of this post for the SCS version of this technique.
Try this technique out yourself. Experiment with various colored Spectrum or Kaleidacolor ink pads. It's a fun technique and your results are different each and every time.
Until later. . .

Boo-boo Card

Just a random card I made. I saw this bear stamp in a pile and decided to create a card with it. Don't you think the bear is such a cutie.

Card description:

Stamp: Stampabilities Boo-boo Bear
Ink: Stampin Up pastels and markers
Paper: Stampin Up Positively Pink cardstock, DCWV scrapbook paper
Accessories: Making Memories Ribbons, Large copper brads, Stampin Up Crafter's tool kit (paper piercer), Foam tape

Featured Website of the Week - Page Maps

I love this website. Page Maps is my "Featured Website of the Week". Click on the title of this post to link to the website. The link will also be located under "Featured Website of the Week" at the top of this blog site.

Although I create my own sketch layouts for the cards that I post on my blog site, this website have an extensive amount of sketches that can assist you with your scrapbooking and card layouts. When I am stumped and in need of a layout idea, I look to this site for inspiration. Check it out, I think you'll REALLY love this site.

Featured Blogger of the Week - Inkventive Expressions

I found a great blog site to feature this week. The site name is INKventive Expressions. I have chosen this blog site as my "Featured Blogger of the Week" Similar to Allison's Stampin When I Can blog site, Cori's INKventive Expressions blog site is filled with great card ideas. She blogs regularly - more so than I do, can you believe it and post tutorials as well! My "Featured Blogger of the Week" is located above my post and is a fixed category. It will remain up for a week and will later move to the right of my blog site under the category "Featured Bloggers" so that you can visit the featured bloggers at anytime thereafter.

Thursday, January 25, 2007

Please take my poll!

Please take the poll located at the right of my blog site. I want to post tutorials and techniques that will fit my audience but I'm not sure how new or advanced you are as rubber stampers. Taking the poll will help determine how I create my tutorials and what type of tutorials I should post. I've been assuming that most of my readers are advanced enough to understand rubber stamping terminologies, therefore, may not explain or define things and maybe I should. If most of my readers are more on the advanced side, well I don't want to bore you with simple techniques and if you are new, I don't want you to think that rubber stamping is way too complicated. Honestly, it's not! I want you to have fun creating and it can be as simple or complex as you want it to be.

Anyway, thank you for your help!

Until later. . .

Dolly Mama's - Funky Stamp


I love this stamp by Stamps Happen, Inc. There's a series of these Dolly Mama's and they are so cool and funky!
This one is called "Big Girl Panties" and the sentiment says "Put your big girl panties on and deal with it! Isn't that hilarious!
To dress up the card I used a DCWV striped scrapbook paper and 5/8" organdy ribbon tied in 3 bows down the side. I didn't want to add too many embellishments that will distract from the message of the card!
Sometimes it is best to keep things simple ladies!
Until later. . .
Wednesday, January 24, 2007

That Big Flower again

I made another card using the big flower again. . .click here for the previous post with the tutorial on coloring or shading the flower. I haven't used buttons for such a long time and I have tons of them. Lately, I haven't seen many cards using buttons. I like buttons especially on big flowers.

I had an extra flower that I stamped so I created this simple card. Sometimes simple is good. . .you don't need to make a complicated card filled with "blings" to make a pretty card. Sometimes we go over-board with the colors and sketches that the card begins to look busy and the message sort of gets lost in the design.
Anyway. . .just sharing.
Until later. . .

Polished Stone/Embossing Technique

I posted a tutorial on the "Polished Stone" technique on my "Stampin Inspirations" blog site and wanted to add a link on this blog site for those who didn't subscribe to that blog site or a newcomer who don't know that I have another blog site. I don't want to repeat the tutorial on this blog site because of the redundancy issue for those who read both blog sites. I also have other samples using this technique on a previous post. . . .click here to view them.

Check it out. . .either click on the title of this post to link to the tutorial or click here.

Until later. . .

Floral Bouquet - Cheap Stamps

Just a card I made last night. Normally, I don't know what to do with the corner type rubber stamps because they usually don't fit in well with my design but this set of rubber stamps worked well together. I rubber stamped and colored in the images with pastels and shaded with markers. I then cut out the images and mounted them using foam tape to give the central image a framed look. I enhanced the flowers using Stickles glitter. I think this card turned out well.

The stamps by the way are from this really cheapy set that you would find at the back of the shelf sort of hidden away. I don't even know who makes them. Sometimes you can do wonders with cheap rubber stamps. You just need to use a little creativity and you may have to work a little harder to achieve a well designed card but don't discount those not so popular rubber stamps. Sometimes it is worth taking a look when you're at the craft store.


Until later. . .

Tuesday, January 23, 2007

Easter Cards

I know Easter is a few months away but I decided to work on a few Easter cards mainly because I really like this stamp image. Personally, I believe it's a good idea to start working on holiday cards a few months in advance so you don't feel overwhelmed and rushed. When you're not rushed, I believe it's easier to be creative.


Anyway, here are two Easter cards that I made today.

Both cards were basically made using the same materials but with a different layout.


Stamps: Stamps Happen, Inc. Butterbean with Carrots, sentiment: Hero Arts Easter Greetings Ink: Stazon jet black, markers, and pastelsPaper: (1st card)White glossy cardstock, Chocolate Brown, DCWV Olive, and Stampin Up Pretty in Pink, DCWV scrapbook paper ; (2nd card) White glossy cardstock, Stampin Up Bordering Blue and light lavender, DCWV scrapbook paper
Accessories: Grosgrain ribbon, satin ribbon, eyelets, brads, corner punch.

Until later. . .

Daily Special - Sketch Challenge 3

I decided to switch my Tuesday's Daily Special for tomorrow's Daily Special just for this week because I posted a technique the other night. Anyway today's Daily Special is "Sketch Challenge". I love sketch challenges because many times we can't think of a layout for our cards and stick to what is familiar. Sketch challenges help in adding diversity to your cards.


Stamp: Penny Black "A Great Surprise", sentiment: Printworks "Happy Birthday"
Paper: Stampin Up Blue Ballet, Brocade Blue, DCWV scrapbook paper, lavender cartdstock
Ink: Stampin Up Lavender Lace markers, Stampin Up Pastels
Accessories: Organdy ribbon, foam tape

Try this sketch out and see what you can make and most of all, have fun making it! Okay!

Until later. . .

Monday, January 22, 2007

Daily Special - Anything But Cards 2

Check out my other blog site "Stampin Inspirations" for a tutorial on "Altered Clipboard". I altered a clipboard using acrylic paint, Modge Podge, rubber stamps, and scrapbook paper.

I didn't have a chance to work on a project for this blog site because I was a little busy today but I'll work on a project tomorrow. Click on the title of this post to be directed to the tutorial.

Until later. . .

Sunday, January 21, 2007

Hirschberg Schutz & Co. Inc. Recall of Metal Charms

The charms are labeled under the brand "The Card Connection". Click on the title of this post to link to the US Consumer Product Safety Commission recall of these scrapbook metal embellishments made by Hirschberg Schutz.

These metal charms have a high level content of lead and may be harmful to young children. Apparently a little girl was using a handmade necklace with a charm and placed it in her mouth and began displaying signs of neurological abnormalities which were traced back to the metal charm. These charms were sold at Michael's from 2002 to 2005.

I love this brand's embellishments. . .it's not harmful to adults but children may place these particular charms in their mouth and may cause neurological damage due to the lead content of these charms.

If you have little children at home, please check to see if you have these charms (pictures posted on the recall site) and throw them away or follow the US Consumer Product Safety Commission guideline to receive a refund.

Until later. . .

Sunday's Daily Special - Embellishment Galore plus Quick Tutorial

Whoohoo! I actually am posting my daily special on the day it suppose to be posted. Typically, I'm late. Today's daily special is Embellishment Galore. As a bonus, I added a quick tutorial.

The photo isn't that great because I took it under low lighting. I'll replace the picture tomorrow with a better photo. In this picture you can't see the metal embellishment with the sentiment due to the shadow cast on to the photo.


I added a few embellishments to the card to enhance it a little bit. The center of the flower was created using a scrapbook brand called "The Card Connection". I love this brand of scrapbook items. BUT, check my next post. . .there's a recall on a few scrapbook metal charms manufactured by Hirschberg Schutz & Co. Inc under the name "The Card Connection".

The metal charm with the word "Sweetest" engraved is a metal embellishment by JoAnn. The ribbon was from a set that I purchased from Costco.

Quick Tutorial

This quick tutorial is on shading an image. It's hard to see it in the picture but the flower is colored with two shades of pink. . .one as a highlight and one as a shadow. To create shading on stamped images to give them a non-flat colored appearance. . .scroll down for the simple technique.

Material

Rubber stamp that requires shading

Dye Ink in lighter shade

Marker in a darker shade of the same color family


Ink your stamp with the lighter shade ink


Shade areas of the stamp that you want to add a shadow using the darker tone marker.


The result is a shaded/multi tone image.


That's it. Yup, it was a simple technique but very useful especially with floral images. I think the flower looks a lot better than if it was a flat color. With the card I created, I cut the image out and mounted it on to the card using foam tape to give it a 3D effect.


Until later. . .

Stampedia - Cool Rubber Stamping Website - Check It Out!!

Wow this is such a cool site. It's called Stampedia. Very useful site for rubber stampers. It contains definitions, tips, and tutorials of every aspect of rubber stamping. I think I'm going to start another new feature to my site. If I find a good web site, I'm going to share it and add it as a link, similar to my "Featured Blogger of the Week". I'll call it "Featured Website of the Week" and it will be headlined at the top of my blog and when the week is over it will be added as a link category to the right sidebar of my blog.

You must check out this website. It's a great compilation of tips, tutorials, definitions, examples, templates, etc. linked from various websites. Amazing! One of the best I've seen so far!

My post title also links to this website! Tell me what you think of it!

Until later. . .

Saturday, January 20, 2007

Daily Special - Featured Stamp 2


Today's Daily Special is "Featured Stamp" and I chose two House Mouse stamps. I have a bunch of House Mouse rubber stamps but I chose these two randomly. For those of you who are a fan of House Mouse Designs, you know that the quality of the images are superb. For those of you who have never seen or used rubber stamps with the House Mouse design, it's very easy to create cute cards using these stamps. The only drawback, I feel, is the detailed image requires detailed coloring and if coloring is not your forte', using these stamps may be a pain.


I, typically, stamp the image on glossy card stock and color in the images with pastels and markers. I'm not a big fan of watercoloring primarily because it warps the cardstock unless I use watercolor paper which by the way is expensive. It's difficult to use regular cardstock without having it warp. I have cards that I made a while back and today, the cardstock that I used to stamp the images and colored with watercolor are so warped, I hate it. They seem to worsen with time.

Specifics on the card above:

Rubber stamp: Stampabilities House Mouse Lavender Dreams, Anna Griffin sentiment stamp
Ink: Stazon jet black, Stampin' Up Lavender Lace marker, Stampin Up pastels, Stampin Up Old Olive Classic ink with blender pen
Paper: Eggplant, Stampin Up Green Galore, DCWV scrapbook paper
Accessories: Making Memories pastel eyelets (lavender), Making Memories ribbon, Foam Tape
I'm not particularly loving this color combo but the cardstocks were lying around near my desk so I decided to use them.

Rubber stamp: Stampabilities House Mouse Love in a Teacup, Stampin' Up hearts, Anna Griffin sentiment stamps
Ink: Stazon jet black, Marvy pink and light green markers, Stampin Up pastels, Stampin Up Old Olive Classic Ink with blender pen, Stampin Up Positively Pink
Paper: Burgundy, pink, green
Accessories: Gingham ribbon, Cuttlebug embossing folder, foam tape

Collage/Altered Art - Another Form of Cardmaking

Until I got caught up with the Stampin' Up craze, I created collage cards. I haven't made any lately because I can't seem to do both at the same time. Collage art is such a contrast to traditional card making or rubber stamping. Traditional rubber stamping techniques can at times be a bit confining in artistic expression and the focus tends to be the layout and color combination. Not that it's bad, just easier in my opinion - for this reason, I love traditional rubberstamping.

With traditional rubber stamping, there's a tendency for the cards to look somewhat similar from one artist to another. There's a uniformed appearance to the cards and the techniques are focused on the coloring of the images and how the images are laid out on the card. The cards are easily duplicated by others due to its uniformity and consistency of techniques.


Collage or altered art is a free expression using various mediums from scrapbook pieces, inks, paint, glues, paper, textures, techniques, coloring medium, or whatever else you may have lying around that can be used to create a card. Traditional rubber stampers sometimes see this form of cardmaking as "messy", "busy". . .I've had people tell me that it's just random stamping and gluing - "just a bunch of images and things slapped together".

Contrary to this belief. . .I find collage or altered art a lot more difficult to create because there's no "text book" way to create the cards. You can't look at another person's creation and attempt to duplicate it. It's pure imagination and creativity. There's no set measurements, colors, technique, etc. . . For this reason, it's a lot more difficult to create.

I like both forms but lately, my focus has been towards traditional rubber stamping but from time to time, I think I'll make a few collage cards and work on a few altered art projects. Just to add a new element to this blog site.
I just wanted to share a few collage cards I made in the past. What do you think of them? Just curious.


Thursday, January 18, 2007

New Feature to My Blog

I added a new feature to my blog. I will have a "Featured Blogger of the Week" . I was inspired by Allison whose blog site is called "Stampin When I Can". She has a "Inspiring Blog of the Week" on her blog site and she chose my blog site this week. Isn't that cool!

Well, I thought featuring a blog site weekly was such a great idea! Due to time constraints, I haven't really had a chance to look through the vast amounts of blog sites out there. It's difficult to browse through all of them and I'm sure you've experienced the same problem. So as my personal obligation to this new feature, I will pick a blog site each week that I feel is worth looking at (in my opinion).

What I'll look for are readability (intelligent writings), active blogging, interesting topics (not just personal diary or rambling), relevancy to rubberstamping and cardmaking, great features (i.e., links, galleries, etc.), tutorials, graphics, pictures, etc.

I will from time feature a blog site that do not pertain to rubberstamping but I feel is worth looking at. There are great writers out there and I'm interested in many other things besides rubber stamping so I'd like to feature those blog sites too.

I am interested in the global warming issues that plague us today so I may feature blog sites that discusses those issues. I wonder if rubberstamps contributes to global warming. . .hmmmm. . .nah, I don't think so.

The "Featured Blogger of the Week" will be located at the top of my blog site and will be a fixed category meaning it won't be a post. After the week is over I'll add the featured blogger as a link to the right sidebar of my blog under "Featured Blogger" so you may visit it at anytime.

I have a "personal" blog site that do not pertain to rubberstamping or cardmaking and it's called "Reflections and Perspectives" and the link is located at the top of my blog site. It's just my musings of personal interests. I didn't want to ramble on my rubber stamping blogs because I felt people may not be interested in reading them, especially, when they are specifically looking for rubberstamping ideas.

Anyway, look out for my new feature. I'll set it up sometime today!

Until later. . .

Tuesday, January 16, 2007

Valentines Day Galore

I made a few cards a few days ago focusing on Valentines but did not have a chance to take pictures of them. I had time today to take photos of the cards.

I'll update the specifics of these cards tomorrow when I have more time to write them.

For the meantime, I'll just add the photos for you to look at.

**UPDATE: I posted the specifics on the cards. Check it out!!

Card #1

Stamps: StampCraft "Fancy Heart"; sentiment: Hero Arts "Life With Sunshine"
Ink: Stampin' Up Pink Passion
Paper: Stampin Up Cool Caribbean and Pink Passion cardstock, Provocraft "Pocket Full of Posies" scrapbook stack
Accessories: Satin Ribbon, Silver Metallic Cord, and JoAnn's Essential Metal Embellishments

Special feature of this card: The Provocraft background paper is textured and it's beautiful in person. The paper was a little pricey but it's worth it. I bought it at JoAnn's and it was on sale. Unfortunately, they ran out from day 1 of the sale which really pissed me off. They didn't bother to re-stock them knowing they were going on sale which is very, very annoying.


Card #2
Stamp: StampCraft "Fancy Heart"'; sentiment: Hero Arts "Love"
Ink: Stampin Up Lavender Lace
Paper: Stampin Up Old Olive Cardstock, Provocraft "Old World" scrapbook stack
Accessories: Gold trimmed green organdy ribbon, JoAnn Essential metal buckle embellishment, and silver brads


Card # 3
Stamp: Uptown Rubber Stamps "Love Out Loud"
Ink: Black dye ink, Pastels, Markers
Paper: Stampin Up Chocolate Chip, Positively Pink, and Creamy Caramel cardstock, DCWV scrapbook Paper
Accessories: Grosgrain ribbon, brown brads


Card #4

Stamp: DJ Inkers "Home Hearts"; sentiment: Hero Arts "Friendly Greetings"
Paper: Stampin Up "Old Olive", Scrapbook Paper (Maker unknown)
Ink: Stampin Up Pastels, Black Dye Ink
Accessories: Organdy ribbon, Gold metallic cord, JoAnn Essentials gold brads, Sizzix tag die


Card #5

Stamp: Rubber Stampeded "Lilac Heart"; sentiment: Anna Griffin
Ink: Black dye ink, pastels
Paper: White glossy cardstock, Stampin Up Old Olive, Lavender Lace and Eggplant Envy cardstock, DCWV scrapbook paper
Accessories: Stampin Up "Word Window Punch", JoAnn Essential brads, Making Memories ribbon


Card #6

Stamp: DJ Inkers "Home Heart"
Ink: Black dye ink, pastels, Versamark
Paper: White glossy cardstock. Stampin Up Baroque Burgundy cardstock, DCWV scrapbook paper
Accessories: Stampin Up "Word Window Punch", JoAnn's Scrap Essentials - metal tag and brads, Clear glitter embossing powder, Heating Tool
Technique: Heat Embossing, Dazzling Diamonds

Special feature of this card: The background was rubberstamped with two different stamps (don't know who makes them) using Stampin Up Baroque Burgundy classic ink, inked the whole stamped area with Versamark, then heat embossed with clear glitter embossing powder.


Card #7

Stamp: Rubber Stampede "Hugs and Heart"; sentiment: Hero Arts "Life With Sunshine"
Ink: Black dye ink, pastels, markers
Paper: Stampin Up Tempting Turquoise and Lovely Lilac, DCWV scrapbook paper
Accessories: Stampin Crafter's Tool Kit (Paper Piercing), 1/8 hole puncher, JoAnn's brads and metal embellishment, Stampin Up "Word Window Punch", organdy ribbon, silver metallic cord


Card #8

Stamp: Rubber Stampede "Bold Heart"; sentiment: Stampin Up set (don't know the set name at this time)
Ink: Stampin Up Ballet Blue
Paper: Stampin Up Ballet Blue cardstock and DCWV scrapbook paper
Accessories: 1 inch circle punch, JoAnn's large silver brad